-->

7.04.2011

Brownie Swirl Cake


I know Father's Day was a while ago but I am a tad behind on my blogposts and I really wanted to share this recipe with you guys! Like Mother's Day, I had to work for Father's Day and so couldn't make my dad dinner. Instead I prepared a dessert for him ahead of the date. My dad has simple taste and likes heavy, chocolately desserts. He also loves cheesecake, which we often have on special occasions, and it replaces birthday cake practically every year. It's like what Dairy Queen ice cream cakes are to others. We're a cheesecake family. 


On various accounts he has mentioned during my baking adventures that if I made brownies, he would eat them. I decided to make my Pops a decadent brownie cake that combined many of the desserts he loves. Except one - rum balls. Sorry I didn't put those in your cake dad, I'll be sure to top this cake with them next time.

This is a brownie made with dark chocolate and cocoa powder and studded with walnuts. It is then swirled with cheesecakey goodness, topped with Toblerone chunks (what else?!) and drizzled with caramel. Are you drueling yet?


It was fun throwing all these delicious ingredients into one decadent cake. Oh yes, it is quite the cake. But what's nice about it is that it's not too rich - the brownie isn't overwhelming. I wish I could say I used whole wheat flour, or reduced the butter... but I can't. This is a scale-tipping, pant-splitting cake. Don't be surprised if you gain a couple pounds after reading this post. I have no idea how many calories are in this cake and I don't want to know. Sometimes, on special occasions we just have to indulge... and take a run on the treadmill afterwards.

Brownie Swirl Cake
1/2 cup butter
1 cup all-purpose flour
1/4 cup brown sugar
1/2 cup sugar
1/2 cup walnuts, coarsely chopped
2 squares baking dark chocolate
1/4 cup cocoa powder
1 package cream cheese, at room temperature
two eggs
3/4 cup confectioner's sugar
2 Toblerone pieces, coarsely chopped (or any other chocolate bar)
5 caramels

Preheat oven to 350F

Grease an 8 or 9 inch circle or square baking dish.

Melt the butter and dark chocolate squares in a sauce pan over medium heat.

Whisk in the sugars and bring to a boil. While continuing to whisk, allow it to boil for one minute and then remove the pan from the heat. Allow to cool for 5 minutes.

In a medium bowl beat the cream cheese until soft. Gradually add the confectioner's sugar until everything is well combined.

In large bowl add the melted butter and sugar mixture. Whisk in the two eggs. Stir in the cocoa powder and flour until well combined. Stir in the walnuts.

Spread the brownie batter into the greased pan. Top it with dollops of the cream cheese mixture. Use a knife to run through the batter making swirls and evening out the cake. Sprinkle with Toblerine or chocolate chunks.

Bake for 20-25 minutes or until an inserted toothpick comes out clean of the brownie batter. Allow to cool and then drizzle with melted caramels.

6.30.2011

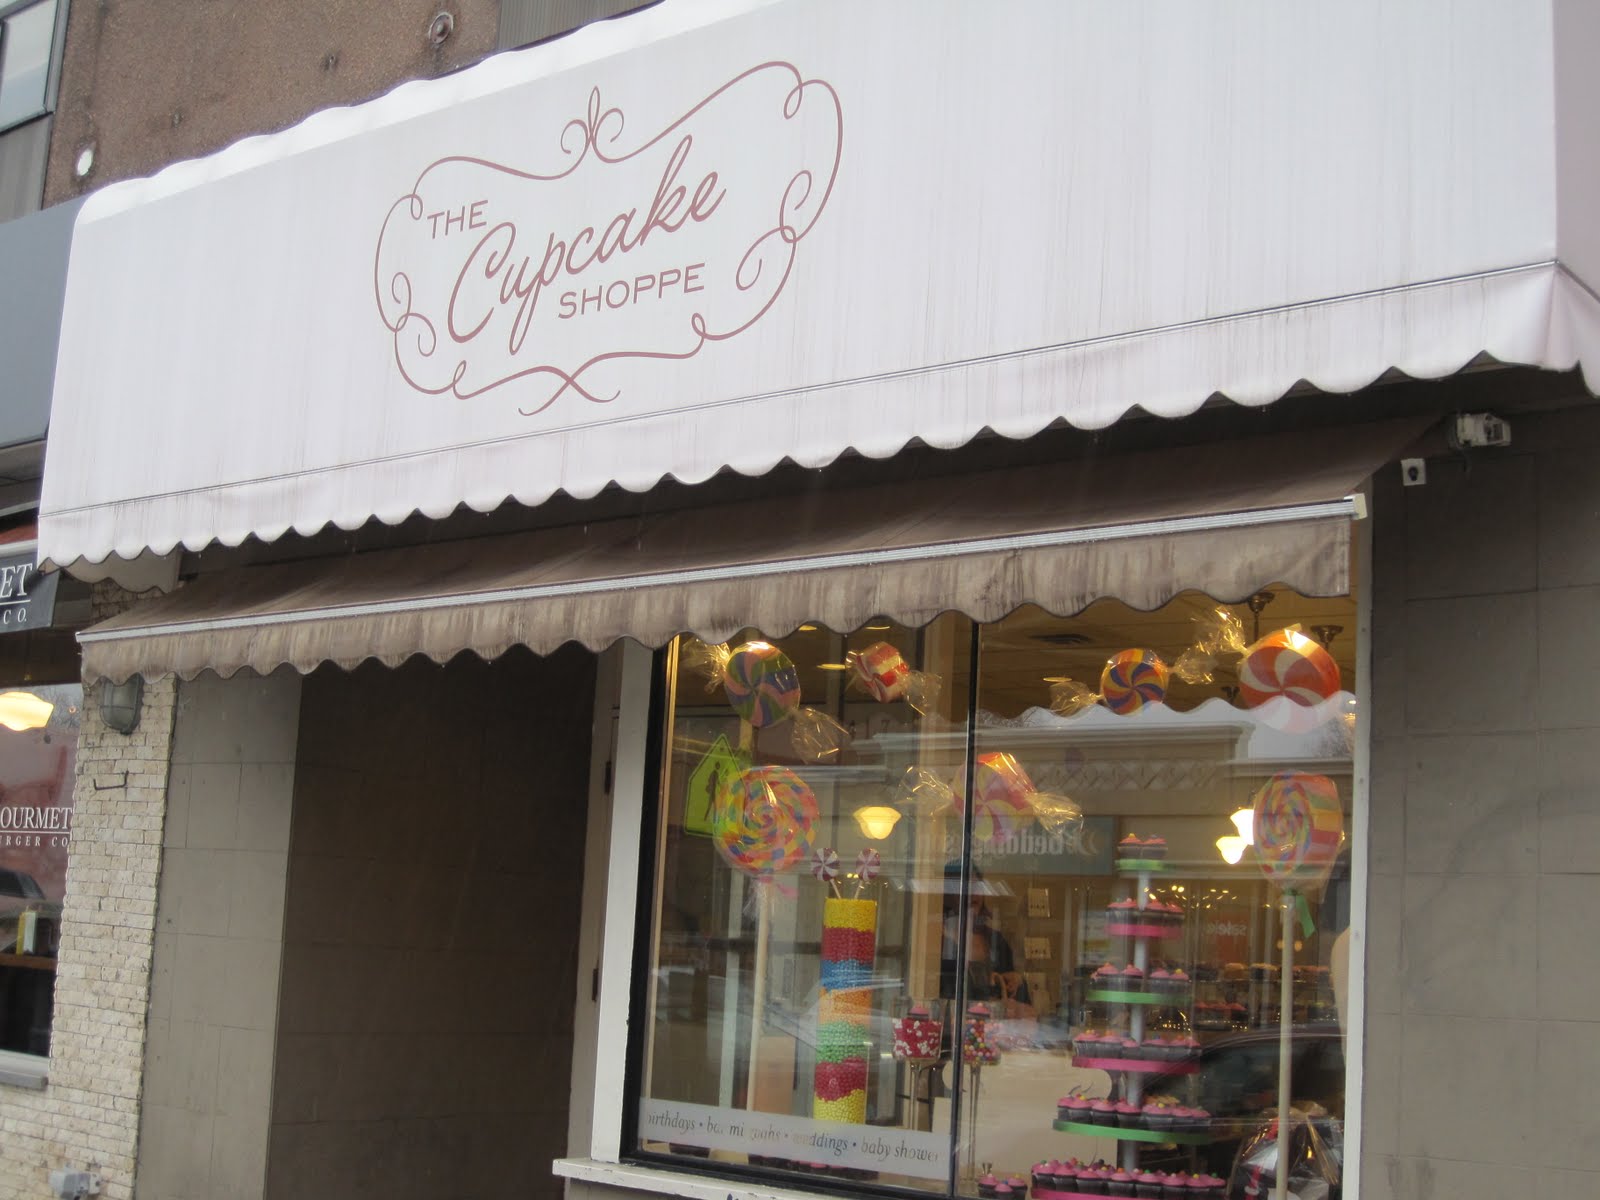
Street Eats: The Cupcake Shoppe


Recently I've been reading up on bloggers' favourite bakeries and sweet eats in Toronto. I've been craving a visit to a specialty cupcake shop for some time now and conveniently came across The Cupcake Shoppe. I was pleasantly surprised to discover that it is located on Yonge St. just a 5 minute walk from the office that I volunteer at. Perfect!!

I checked out their list of flavours ahead of time to see what they had (and to make the in-store decision-making process a lot easier). I was slightly disappointed in their variety, thinking they would have had some more bizarre flavours. The Cupcake Shoppe has been around for a while and I read some good reviews so decided to give it a visit.

Despite some very damp and foggy weather, I ventured out of the office and walked up the street to The Cupcake Shoppe. It is just a tiny little place filled with lots of customers and many beautifully coloured little cakes. I had a look at their menu for the day and sadly they didn't have the Red Velvet or the Eh cupcakes so I opted for the Cookie Dough.

The vanilla cake was great - it was moist and had a great crumby texture, studded throughout with mini chocolate chips. The buttercream was nice too, quite sweet and a bit grainy though. I guess it reminded me a bit of chocolate chip cookie dough but that's a bit difficult to copy in a cupcake form.

They have so many flavours that I really want to go back and try, including the Creamsicle and the Coco Loco. With just a five minute walk from the office it will be hard to stay away...

6.20.2011

Lemon Macarons


These lemon macarons come with baggage. I've been told by my friend that I have to share the macaron disaster story, so here it is:

The last time I made macarons while at uni (third attempt) they completely failed and so that put me off them for a while. I knew that I would eventually have to try it again (and would keep trying until I could get them!!) so a couple weeks ago I invited my foodie friend over to bake a couple batches of macarons. We planned on making lemon macs and pistachio macs. Yum right? I studied recipes for the week leading up to it and made sure I had all the right equipment. I borrowed a digital scale (macaron-making is a serious science people) and food processor from my neighbour. My trusty foodie friend picked up all the needed ingredients and we were set to go with our recipes, outlined parchment paper and heaps of almond flour.


We made the lemon macarons batter first and all was going well until I began piping the blobs on the parchment paper. They spread out way too fast... uh oh. I over-folded the batter. Nice one Jen. I also came up with the brilliant idea of using liquid food colouring. Red flag - Only ever use powdered food colouring when making macarons because the extra liquid will mess up the meringue. We decided to bake them anyways but what we pulled out of the oven I don't think you can call macarons. Macaron batch #4 = fail.

With almond flour, pistachios, plenty of icing sugar and a grain of hope we decided to try again! Foodie friend started grinding the pistachios and the flour started to become clumpy... it was turning into pistachio butter! NOOO!! We salvaged what we had left of almond flour, made some pistachio butter sculptures, and whipped up a plain macaron batter. This time my friend counted 50 folds and the batter looked pretty good! As he piped he made huge blobs (unaware that they were supposed to be about half the size). They took a bit longer to bake because they were so big but they did end up with feet! They were cracked, odd-shaped and ... sadly they could not pass for macarons. Macaron batch #5 = fail.


A pretty disappointing baking party I must say. I was so upset with our 'macarons' that I held onto my neighbors kitchen equipment for a few extra days and vowed to create beautiful lemon macarons before returning it.

I bought new almond flour and studied some more recipes. I now knew everything NOT to do when making macarons so I knew this batch would go better. Watching a few macaron-making tutorials was the trick I think (I would advise newbie macaron makers to hit up youtube). I decided to use a basic macaron recipe from Tartelette because she's quite learned in this science. I used her measurements but added in some lemon zest. No food colouring this time! I ground my almond flour and icing sugar together and added it all at once to the egg whites. I counted 50 folds and immediately stopped. I piped little blobs onto circle traced parchment paper. I left the shells to harden for a full hour on the counter. I put them in the oven at 280F for 15 minutes. I switched on the oven light and sat down and watched my macs grow. I cannot describe to you my utter joy and excitement when I saw feet forming on my uniform macarons. I took them out of the oven and let me tell you... not one of them cracked! HALLUJAH! They looked great and had the right chewy texture.


Macaron batch #6 = success! Finally, after 3 fails I created a beautiful tray of lemon macarons to share with family and friends.

Don't the colours look beautiful and perfect for spring? I tried out two different buttercreams: a lemon and a strawberry. The lemon buttercream was definitely my favourite but I love the appearance of the bright pink squished between the white shells.


I know these are no Laduree macarons - the meringue sunk a tiny bit and they weren't all perfect circles but that is something I will just have to perfect with future batches. I am still very happy with how these lemon ones turned out. They have satisfied my macaron-making urges for now. I really want to make carrot cake macarons (wouldn't those be delicious?!) but I'm going to take a break from macarons for a while I think. I've got a list of other things I really want to make first! I'm dying to make donuts, and a few savoury dishes too.


Honestly I really wish I could just spend everyday experimenting with recipes but unfortunately instead I have to spend 6 days a week at work. And it's no where near a kitchen. Joy.

Lemon Macarons
adapted from Tartelette

90 gr egg whites (about 3)
30 gr granulated sugar
200 gr powdered sugar
110 gr ground almonds
1/2 tsp lemon zest

Line your cooking trays with parchment paper and trace circles onto it that are 1.5 inches in diameter.
Put the powdered sugar and ground almonds in a food processor and pulse until everything is evenly combined and free of lumps.

In a large bowl beat the egg whites. When they start to look foamy start adding the granulated sugar, small spoonfuls at a time. Keep beating until you reach a glossy meringue that can hold its peak. Do not overbeat the meringue.
Add the lemon zest and ground almond and sugar mixture to the bowl. Begin folding everything quickly at first, and then slow down. Remember to make the folds carefully and gently. This process should take about 40-50 folds. At this point the batter should be able to slowly fall back on itself.

Fill a pastry bag with the batter and pipe small rounds onto the circle-traced parchment paper. Once you are finished, give each tray a couple smacks on the counter to release any air bubbles.

Leave the trays on the counter for 45 minutes - 1 hour so that the shells can harden (otherwise they will crack in the oven).

Preheat oven to 280F

Bake the shells for 15-20 minutes. Keep an eye on them and be sure to turn the trays if some bake faster than others.

When you take them out of the oven immediately remove the parchment paper from the trays to prevent them from continuing to cook and let them cool on the counter.

Peel them off gently, if they stick a little it's okay - it means you didn't overbake them!

Store in an airtight container.

To fill the shells pipe your desired buttercream onto one shell and top with another.

6.13.2011

Let's Eat

Just a few yummy photos of some recent eats ...


Pizza topped with pomodoro sauce, caramelized onions, brie, prosciutto and fresh basil


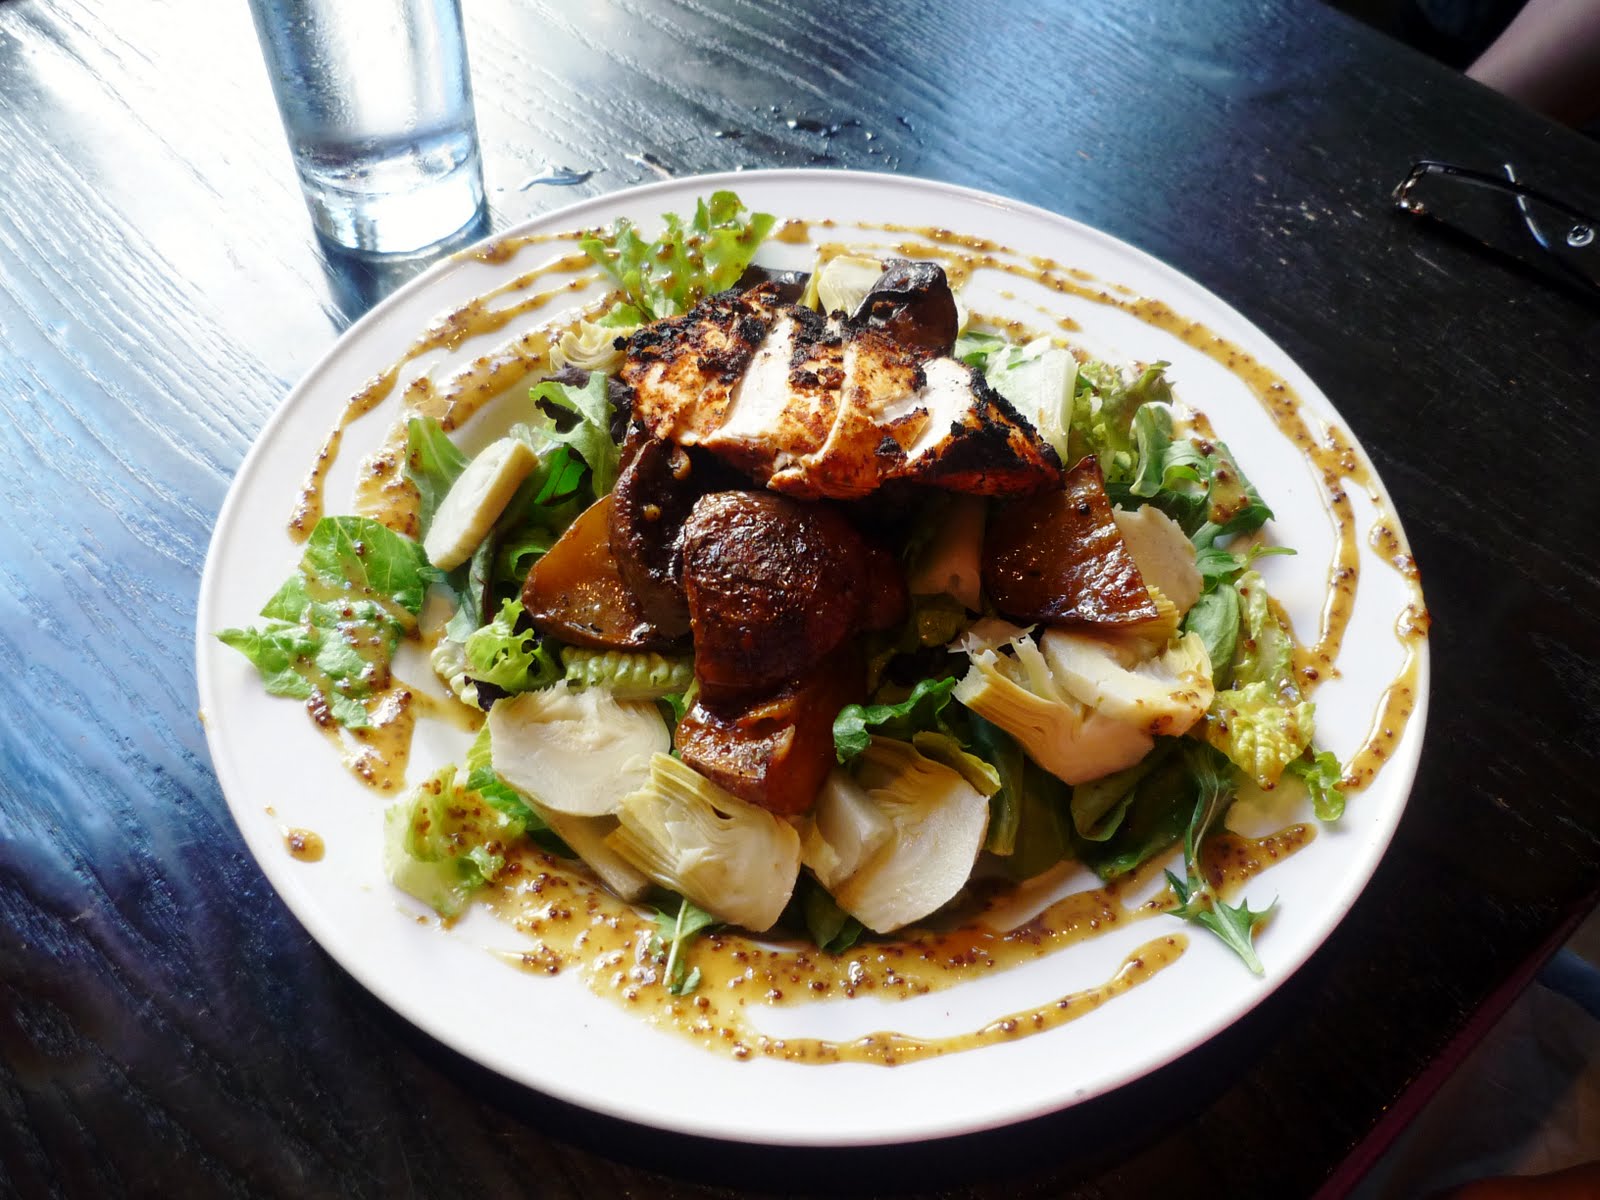
Roasted red potato, artichoke and mustard greens in lemon chili roast garlic vinaigrette, topped with blackened chicken breast and mustard seed sauce


Vanilla bean creme brulee


Chocolate bread pudding


Lettuce roll with crab and ginger


Cucumber roll and unagi hand roll


Tempura banana with green tea ice cream


Turkey Burger topped with avocado spread, roasted red pepper, goat's cheese and truffle mayo


6.02.2011

Healthy & Chewy Granola Bars


Well as many of you know I have an addiction to granola. Whether it's store-bought or homemade I can't get enough of the stuff. I eat parfait practically everyday, and on the days I don't, I still find my hand reaching into the cupboard for a handful of granola. Some mornings I have a bowl of oatmeal, but it's just not the same.


The other day I was really needing a granola fix and decided to make some chocolate-orange granola. Yum. I'll have to make it again soon and share the recipe with you guys.


I decided to make some granola bars for a change. I wanted healthy bars packed with yummy dried fruits and nuts and seeds and flavour.

Time to hit up Bulk Barn! Don't you just love that store? I love browsing the aisles there, they just have everything you could think of! Not to mention an amazing variety of dried fruits, nuts and seeds. Oh, and they also have quite the assortment of granola. I forced myself to steer clear of that aisle.


It took some intense decision making but I settled on dried dates, golden raisins, sunflower seeds and almonds. These granola bars turned out very chewy and full of these add-ins. They are a great snack and give you an energy boost. These are also highly customizable so you can throw in whatever you feel like, or whatever you've got in the cupboard. Try out a variety of fruits and nuts! I know I will :)

These satisfy my cravings throughout the day but it remains a challenge to just eat one and not go back for more.


Healthy & Chewy Granola Bars
Makes 15-20 bars

Ingredients:

3 cups oats
2 cups puffed rice cereal
1/2 cup dried, pitted dates, coarsely chopped
1/2 cup golden raisins
1/2 cup almonds, coarsely chopped
1/3 cup sunflower seeds
1/4 cup graham cracker crumbs
1 cup apple juice
1/3 cup brown sugar
2 tbsp honey
1 tbsp butter or nut butter
1/2 tsp cinnamon

Preheat the oven to 350F

Grease or line an 8 or 9 inch baking dish with parchment paper.

In a large bowl add the oats, puffed rice cereal, almonds, sunflower seeds, dates and raisins and mix together.

Melt the butter (or nut butter) in a saucepan over medium heat. Add in the apple juice, honey, cinnamon and brown sugar and stir together so that everything melts and combines.

Take it off the heat and pour it over the dry mixture. Stir the mixture until everything is evenly coated.

Press the granola mixture into the greased or lined baking dish using the back of a spoon or your hands.

Bake for 20-25 minutes or until it starts to brown around the edges and crisp. After it has cooled cut into bars and store in an air-tight container.

Makes about 15-20 granola bars.